Adding Google Analytics to your Next.js project
Adding Google Analytics to your code base is fairly easy. Most of the work is actually setting up Google Tag Manager and Google Analytics outside of your code.
Google Analytics setup
- Go to Google Analytics. You'll want to click the
Start measuringbutton like in the image below.

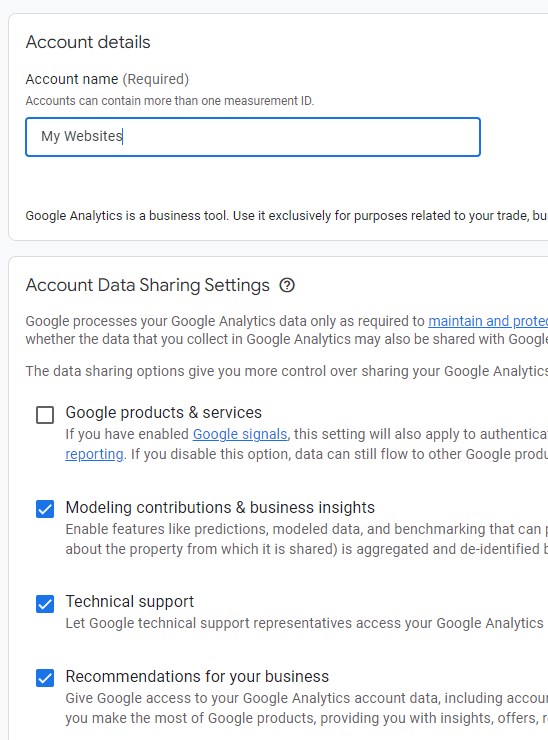
- Create an account name and accept whatever data sharing settings you would like.
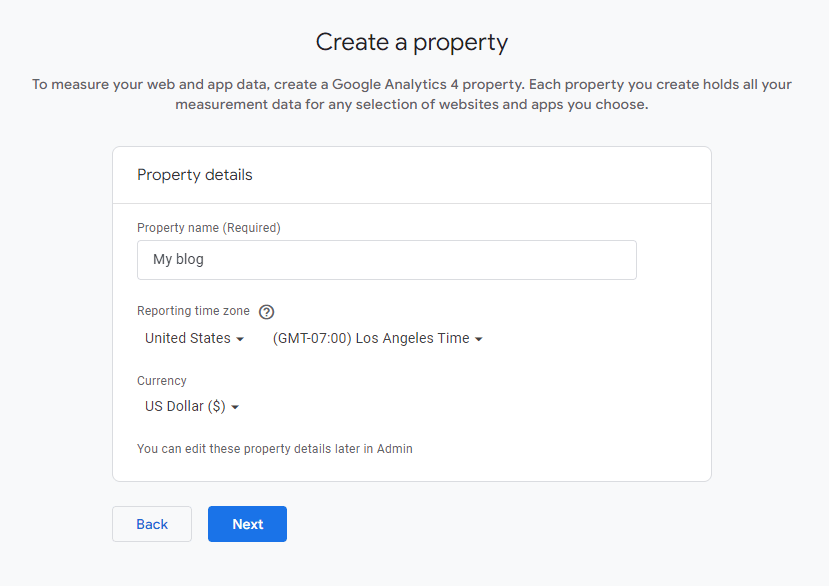
- For the property, all we need to do is set the name. You can also update the time zone and currency if you need to. The currency is used to attribute real money value back to events if you want to set that up, but for now we're going to ignore it.
- Choose your platform type.

- Give your data stream a name and a URL for Google Analytics to watch.
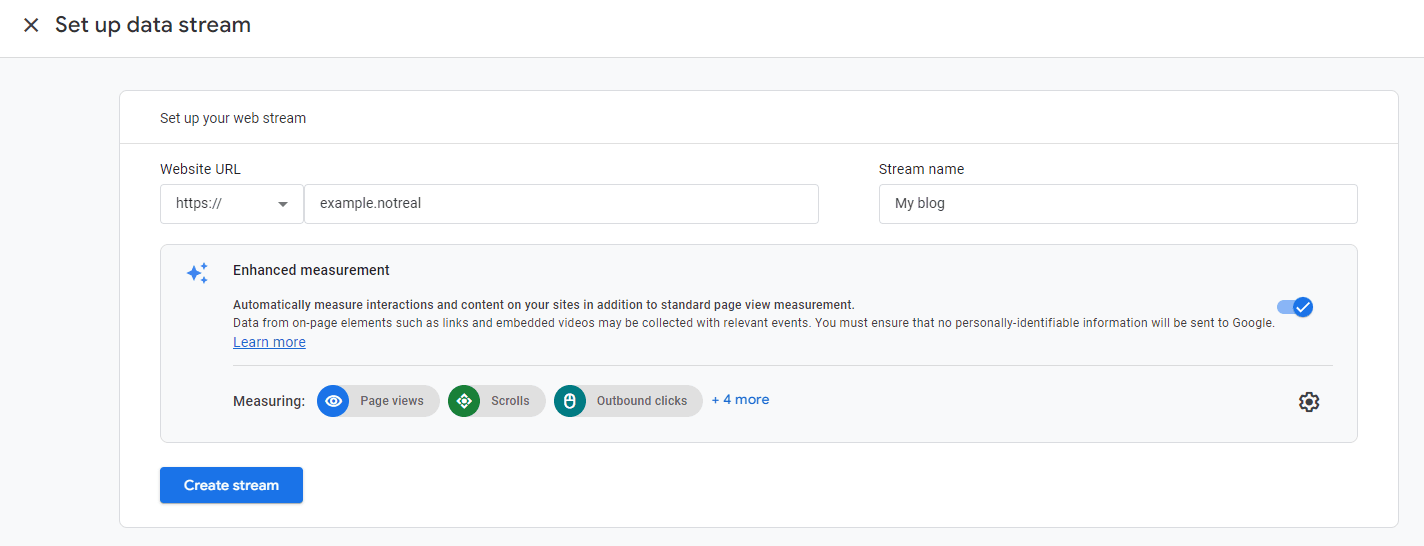
- Once we create the web stream, we'll be taken to a screen that shows the details about the web stream. You'll want to grab the
Measurement ID, because we'll need it shortly.

Google Tag Manager setup
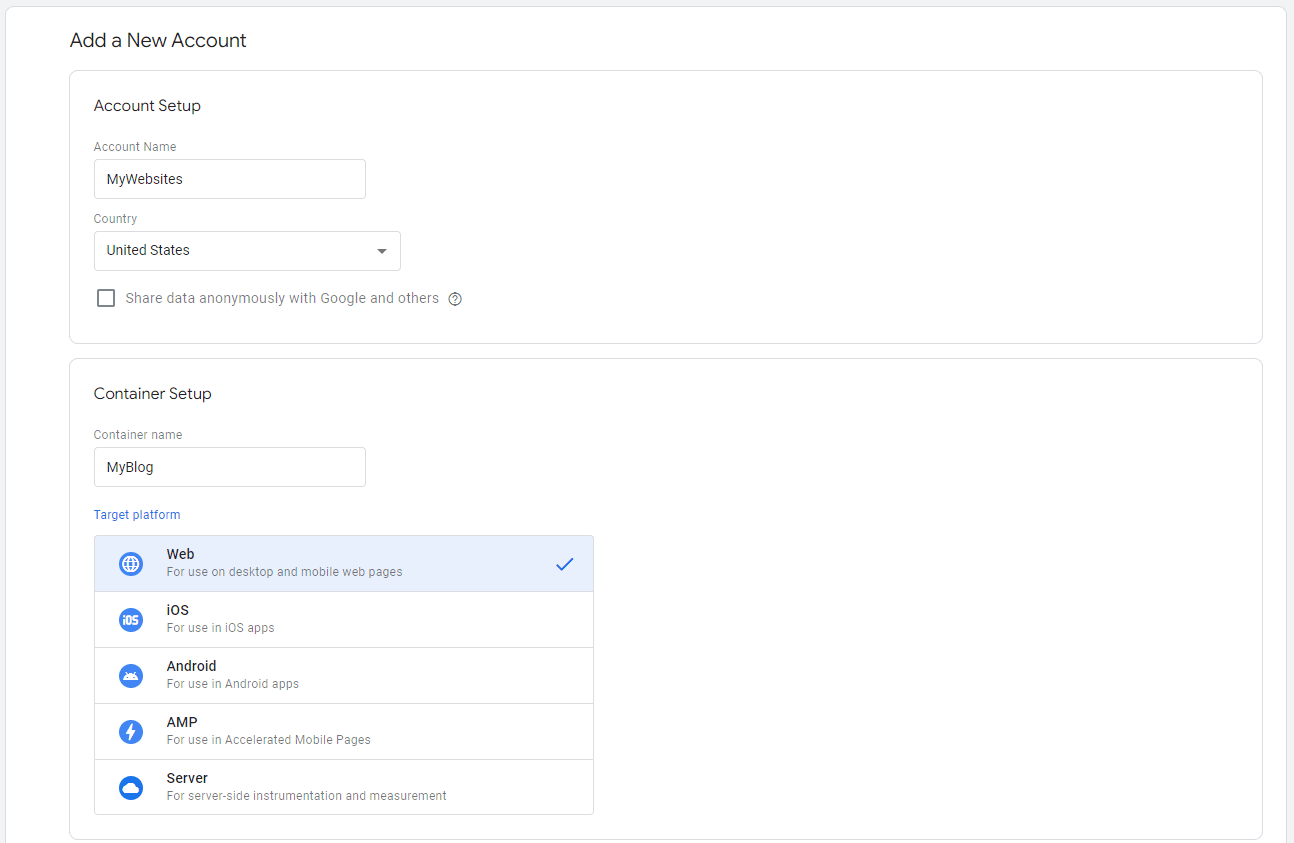
- Go to Google Tag Manager. Once you're here, you will need to create an account like the image below.

- Add an Account name and a Container name. Think of the account name as the folder for a collection of websites and the container a website within this folder. Then select a target platform for your container.
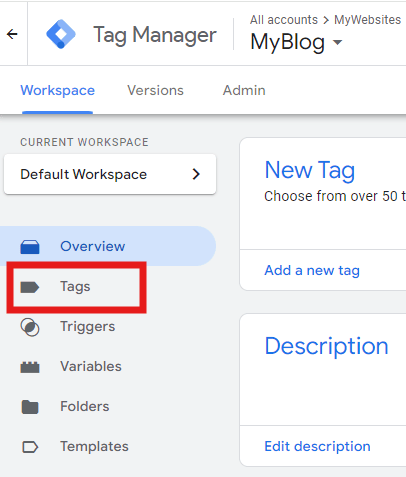
- On the left side of the UI. Click Tags. Once you're here, create a new tag.
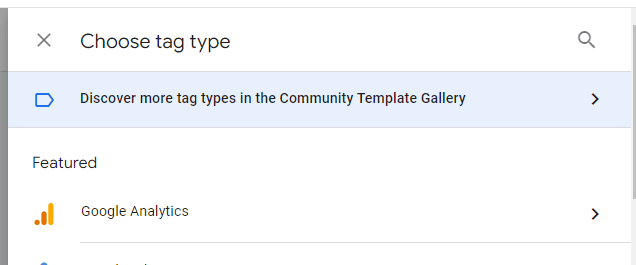
- Choose the tag type Google Analytics.
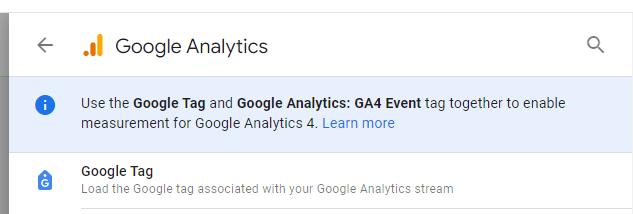
- Choose Google tag.
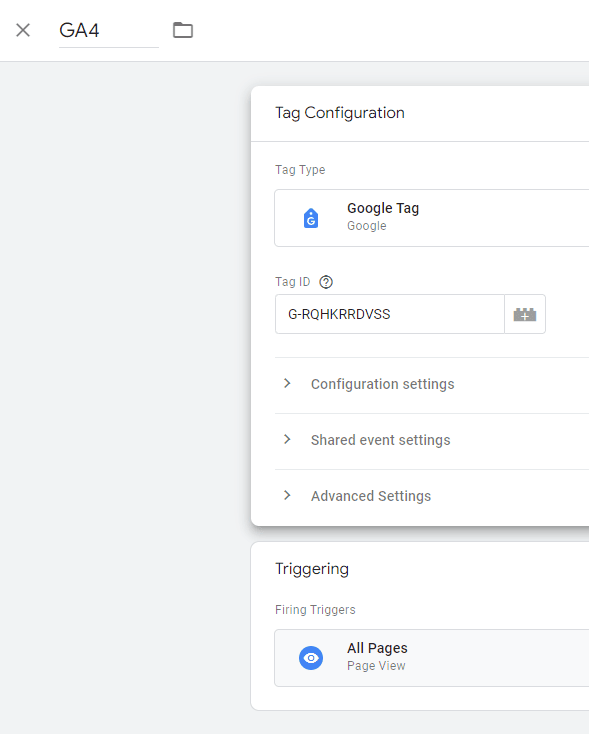
- Now you want to name your tag, add the
Measurement IDto theTag IDin this tag and set the Trigger to be on all pages. Save the tag. Later on, if you decide to do more than just page views you can set up custom events and target specific pages.
- Next, look top right. You'll notice a
Submitbutton and some text that says you have workspace changes. Before the tag starts to work you need to publish these changes. ClickSubmit.

- On the publish screen, add a name for the version and a description. Click Publish. Your new tag or tags will now be live.

- The last step is grabbing the Google Tag Manager ID, which can be found next to the workspace changes like the image below.

- Now all we need to do is add the ID from Google Tag Manager back into our code. The Google Tag Manager ID will go into
gtmId.
Library imports
Let's import the third party library provided by Next.js. You can read more about it here.
npm install @next/third-parties@latest next@latest
Code setup
From here all we need to do is add Google Tag Manager to our layout.tsx file.
We'll need to import the GoogleTagManager component from the third party library and then include it within the html tag. Then add the Google Tag Manager ID to the gtmId attribute for the component.
import { GoogleTagManager } from '@next/third-parties/google';

...

export default function RootLayout({ children }: Readonly<{ children: React.ReactNode }>) {
  return (
    <html lang='en'>
    <GoogleTagManager gtmId='GTM-XYZ' />
      <body className={inter.className}>
        {children}
      </body>
    </html>
  );
}
And that is basically it. You'll need to wait 1-2 days before you start seeing data in Google Analytics.
I would also like to note that you can add Google Analytics directly to Next.js via the third imports. However, I would recommend using Google Tag Manager. If you ever decide to add more external scripts to your site you can add them as tags to Google Tag Manager instead of cluttering up your code base.